 |
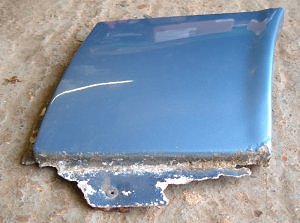
I'd cut the bottom of the aluminium wings off the Aston at the start of the project as I needed access to the A and B pillars, and I'd seen it done elsewhere so reasoned it must be possible to weld them back on later. If the worst came to the worst I could employ a professional welder. Steel welding I can do. I had no experience of Aluminium welding, and the time had come where it was holding up the project. I had to bite the bullet and start the work. |
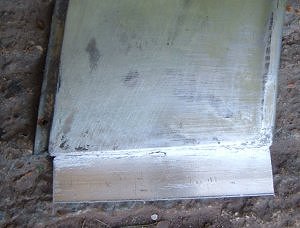 |
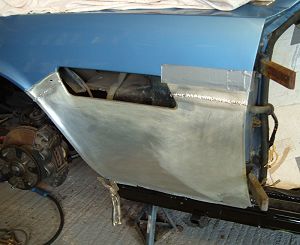
The first weld was a corner weld repair to the rear wing. Corner welds are trickier than flat panel welds and I wondered whether I had bitten off more than I could chew. Fortunately, I had some good advice from the MIG Welding Forum and got the hang of it (I've since written a couple of web pages about how to do Aluminium welding). Incidentally, the sides of the repair section in the photograph should be tapered (like the front wings lower down this page). |
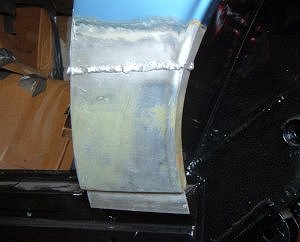 |
Another mental hurdle was welding onto the actual car. Getting the panel into the right place wasn't difficult as I could use the door for reference. I was terrified about distortion as Aluminium does tend to distort more than steel, and even steel body panels are a pain for distortion. I welded the section in 1 inch runs with a 30 second delay between runs. I also used a brass heat sink behind the panel to take out the excess heat. Distortion wasn't an issue. |
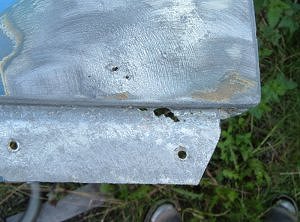 |
Over to the front wings and I find some more problems. The paint has bubbled at the base of the front wing (where mud would have collected). There is a large hole at the top of the lower flange, and a couple of pin holes in the panel itself. Cutting the panel away and replacing the corroded sections would be a tricky option as the panel is rather complicated. A lot of restorers just make new lower sections for the wings. |
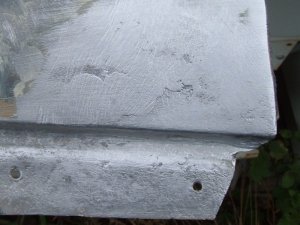 |
Rather than replacing the whole section I cleaned up the problem areas, and filled up the holes with weld. With the welds ground down the repair looks good. |
 |
The front wing was a little more scary. It's a big area, and getting it wrong would have messed up the door gap, or made the whole wing bend inwards or outwards. It took half a day of trial fitting to build enough confidence to risk a weld. There wasn't enough space between the wing and the A pillar to use a heat sink, so the rear section of the front wing was welded without one. Fortunately I'm getting better at aluminium welding so it went without problems. |
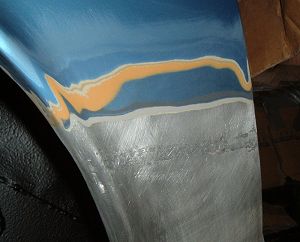 |
You can use a stone grinding disc on an angle grinder to remove the excess weld, but I chose to use a rasp file followed by a big metal file, then a little metal file, then various grades of sandpaper. I'm really pleased at the way it's turned out. The inaccuracy of the welding plus any distortion are very much less than the thickness of the paint. Mind you, Aston Martin weren't economical in their use of paint, nor were the people who did a really bad respray in the 1980s so the paint is quite thick and poses the problem of whether It's worth stripping all the paint away on the door closing faces, or whether I can cope with leaving a slightly tapering gap caused by the thick paint. |
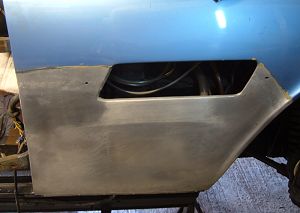 |
I made a big mistake on the front wings. Aston Martin put a bend line in the body about 3/4 inch below the bottom of the wing vent. And the cut I made forward of the vent crosses that bend line. It's a real pain to get the shape right at the bend line and I'm left wondering if the correct shape is slightly odd or whether I've distorted the panel during welding. Looking at the other side is no help as it was obviously different when it came out of the factory (the bend is 1/2 inch lower on the panel). I really wish I'd made a horizontal cut rather than a diagonal cut at the front of the wing. |
Back to: Aston Martin Restoration