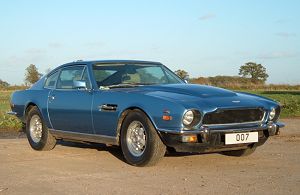
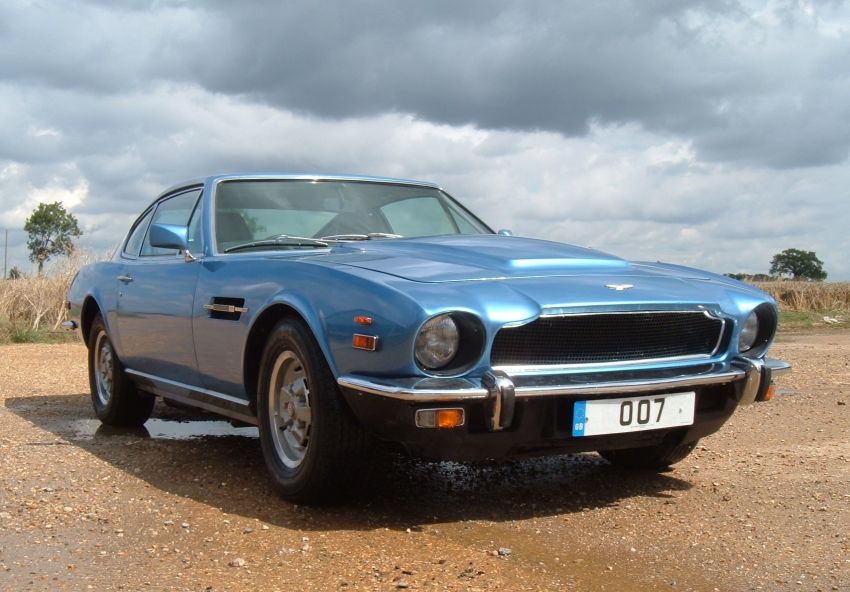
The Aston Martin V8 arrivesI have been asked to carry out a chassis restoration on an Aston Martin V8 Oscar India. It's not a famous one - the 007 registration in the photos is a photoshop effort to protect the identity of the car. I thing it's a wonderful car - with the leather interior, bonnet bulge and smooth V8. I've written some words about my first impressions (see the link below). |
 |
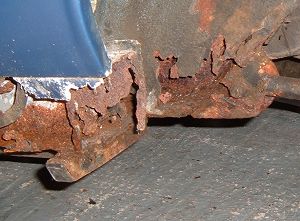
Initial inspection and stripThe car needs sill replacement and some rear chassis repairs. The sills on these cars tend to rust due to mud trapped inside the stainless steel sill covers. This spreads into the A and B pillars and the rear chassis legs. I've taken a few photographs during the strip down to show where these cars rust. |
 |
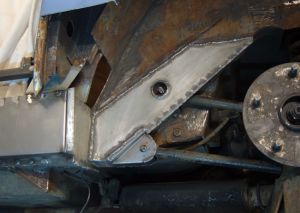
B-pillar and rear chassis weldingThe rear chassis and B-pillar were quite corroded and needed a lot of repairs before the new sills could be attached. I had to be careful with the sequence of repairs so that I didn't lose sill alignment. A simple suspension jig ensured the new rear chassis members were welded in the correct place. |
 |
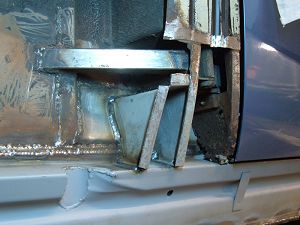
A-pillar weldingThe A-pillar had rusted as badly as the B-pillar and a lot of rusty metal needed to be removed before repairs could commence. Only the inner section of the A-pillar were repaired prior to fitting new sills. The sills were needed as a reference for the outer sections. More> A-pillar welding |
 |
Fitting new sillsThe A and B pillar repairs completed the set of mounting flanges needed to fit the new sills. The door was refitted prior to welding on the new sill so that door gaps could be monitored throughout the sill fitting process. The door gaps ended up pretty well perfect. More > Sill welding |
 |
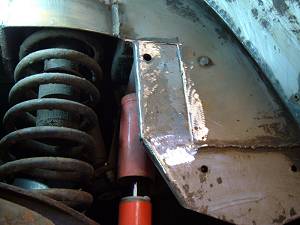
More weldingEven with the sills and pillars finished it wasn't time to move on to the other side of the car. There was rust in the wheelarch and rear wing lower attachment needed some attention More > Welding at the rear |
 |
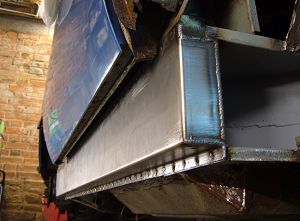
Repairing the Aluminium BodyworkThe biggest challenge of the project. Aluminium is a pain to weld. Worse, this aluminium has corroded slightly and needs to be reattached to an Aston Martin, a car where they've paid special attention to panel fit and surface finish.... More> Aluminium Welding |
 |
Treating rust and preventing rust traps.Going the extra mile to make sure the work described on this website will not need doing again any time soon. The technique on this car involves sealing, zinc rich primer, smoothrite, underseal, plenty of wayoyl, and a general fuss around to add drain holes and trying to prevent mud from sitting anywhere where it could stay damp and rot away the metalwork again. More > Rustproofing |
 |
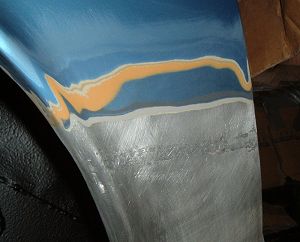
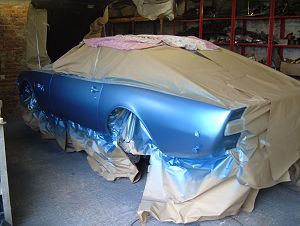
PaintingAn "Aston Martin paint finish" brings up a picture of craftsmen with years of experience spending a very long time creating a finish that is near to perfect. After all it's the paint is most visible part of the car. Not having a craftsman to hand I gave it a go. The paint is in 2 pack metallic base coat and lacquer. The work didn't go all that smoothly mostly due to paint matching problems, but turned out reasonably well in the end. More > Painting |
 |
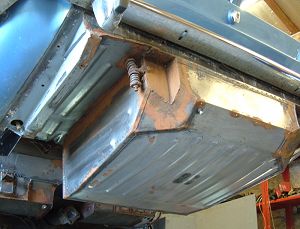
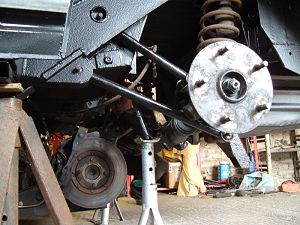
Reassembly - Bolting the greasy bits back onI was surprised to find I'd removed virtually everything from the rear half of the car. Most of the interior and boot trim had come out to protect it from welding sparks, the fuel tank was removed for obvious reasons, and the rear suspension and axle removed for access to the Watts Linkage. The mechanicals are generally sound with only the brakes and rubber parts needing any real work. The main challenge is the sheer weight of all the bits, and, err, serviceability issues characteristic of low volume production. I'm covering the interesting bits on the Aston Martin Restoration Diary |
 |
CompletedAll of the best projects over-run. The car was finally completed after 20 months work (some going for a six month project). Apart from the aluminium welding, anyone who has restored an MGB ought to be able to tackle an Aston Martin V8, but the Aston will take 4 times as long. There's no technology to worry about, just the structure is quite complex and inaccessible, and there wasn't a lot of thought put in to serviceability so mechanical jobs take much longer than expected. Restorations always end up costing more than buying a decent car in the first place. |
 |
About meI'm Malcolm Vardy, an engineer based in Bedfordshire UK. You can contact me by email: Some of my other restoration projects are visible elsewhere on the interweb: MGA and MGB V8 and Renault 4. Parts of the Aston Martin restoration also feature on the mig welding website. Finally I need to mention we have a privacy policy these days. You are here: Aston Martin Restoration |
|